What’s New in Google Analytics 4?
In October 2020, Google moved the next generation of analytics out of beta. Google Analytics 4, or GA4 for short, is billed as a privacy-friendly, “future-proof” web analytics tool. Although longtime Analytics users will recognize a few of the high-level features, at its core GA4 is a complete overhaul of the way marketers track website activity. Cookies are a thing of the past—GA4 uses machine learning to fill in any gaps in your website data. So how do you set up Google Analytics 4?
We set up our own instance alongside our existing Google Analytics property, and put together this guide to help you learn from our experiences!
In this blog you’ll learn how to set up GA4 and what you’ll need to know in advance. Then, we’ll walk you through setting up a new GA4 instance (including some of the roadblocks we hit along the way!) Finally, we’ll offer our thoughts on the new system after a few weeks have passed. Let’s get started!

What You Need to Know Before You Set Up Google Analytics 4
Before you set up Google Analytics 4, you need to know what you’re getting into. GA4 grew out of Google’s work with Firebase, and as such has completely different infrastructure from the legacy Google Analytics.
Are You Running Universal Analytics?
If you’re running Universal Analytics, you have a bit of a leg up—but if you’re utilizing an older version, there’s going to be some work involved. This new infrastructure means a little more legwork, but it also provides two benefits to the upgrade process:
1) Your GA4 instance will run alongside your existing Universal property;
2) GA4 won’t collect your historical data or override your existing tracking.
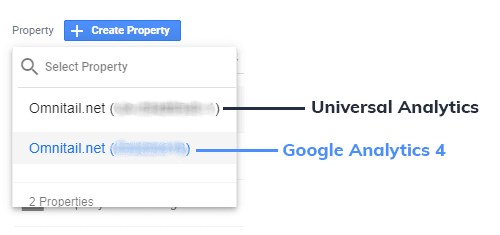
Here you can see our instance of Google Analytics 4 running alongside our Universal Analytics. Knowing this, you can confidently upgrade your property, knowing you won’t lose important website metrics. Now let’s look at a few key differences between GA4 and Universal Analytics.
3 Differences Between GA4 and Universal Analytics
Of course, changes in infrastructure come with downsides too. Thankfully, because the new GA4 property will live independent of your UA property, you’ll be able to compare the two instances and understand the difference in the data you’re seeing before you have to rely solely on GA4. Here are a few of the changes.
1. No Automatic Tracking with Your Analytics Tag
First, Google may not be able to automatically set up your tracking using your Analytics tag (more on this in a minute!)
2. Data Processing Has Changed (Your Metrics Will Look Different)
Second, Google has already confirmed that GA4 makes significant changes to data processing. This means your metric values for any given timeframe will be different in GA4 than they are in Universal Analytics. For instance, user activity is detected automatically in GA4, where Universal Analytics relies on event firing to count users.
This means you’re likely to see far more users in GA4 than you previously did in Analytics. (For more on changes to metrics in GA4, check out “Universal Analytics versus Google Analytics 4 data” from Google’s documentation.)
3. Audiences and Events are Treated Differently
There’s one other major downside to the new infrastructure (one we’re still trying to handle here at Omnitail!) Audiences and events are treated a lot differently in GA4 than they previously were in UA.
This has a ripple effect on everything from simply filtering your internal traffic to tracking conversions. I suggest you audit your existing filters, events, and conversions before you start to set up your new GA4 instance, and consider how you’re going to handle each of them in the new property.
What is Enhanced Measurement in GA4?
One final (but major) consideration: GA4 relies heavily on what Google terms “Enhanced Measurement.” Enhanced Measurement is the backbone of the new infrastructure. It, along with advanced machine learning, helps Google “fill in the blanks” where cookies and/or user identifiers used to provide data. You as the website manager have a responsibility not to pass Personally Identifiable Information (or PII) to Google as a result of this measurement.
For example, you may have a page on your site that allows subscribers to download an account history. Because this history is unique to the user and dynamically populated, the link to access it and the file name both contain the subscriber’s username. The link_id and file_name, which are by default collected with Enhanced Measurement, both contain PII (the username) in this scenario. You’ll need to strip this information out of your site data prior to sending it to Google – these instructions should help you.
Setting Up Your GA4 Instance
Hopefully by now you’ve considered the differences between GA4 and Universal Analytics, and made a plan for your existing filters, events, and reports. Now, let’s walk through how to set up GA4! Here’s how we’ll do this:
1. Prepare for Setup
2. Access Setup Wizard
3. Optional: Google Tag Manager
4. Check Your Data
5. Customize Your Property
1. Prepare to Set Up Google Analytics 4
First, it’s crucial that you understand exactly what’s changed in GA4. We included this step here in case you skipped the above section, but seriously—consider this carefully before you migrate!
Second, make sure you aren’t violating any of the new terms and conditions. This is very important if you pass any amount of PII across your site because you need to ensure you’re not accidentally passing that information to Google in a way that violates the Terms and Conditions.
Finally, make a plan. It’ll just make your life easier if you’ve evaluated your current setup and planned a migration for your conversions, filters, and events. Doubly so if you understand and can explain the differences in metric values between the two systems. Once you’ve prepared for setup, you can jump into Google Analytics.

2. Access Setup Wizard
Now you’re ready to set up your new GA4 property. As a quick reminder, setting up this new property won’t replace your existing Universal Analytics instance. Nothing changes with your existing Analytics; it will continue to collect data, and you’ll be able to effectively compare metrics across the two properties.
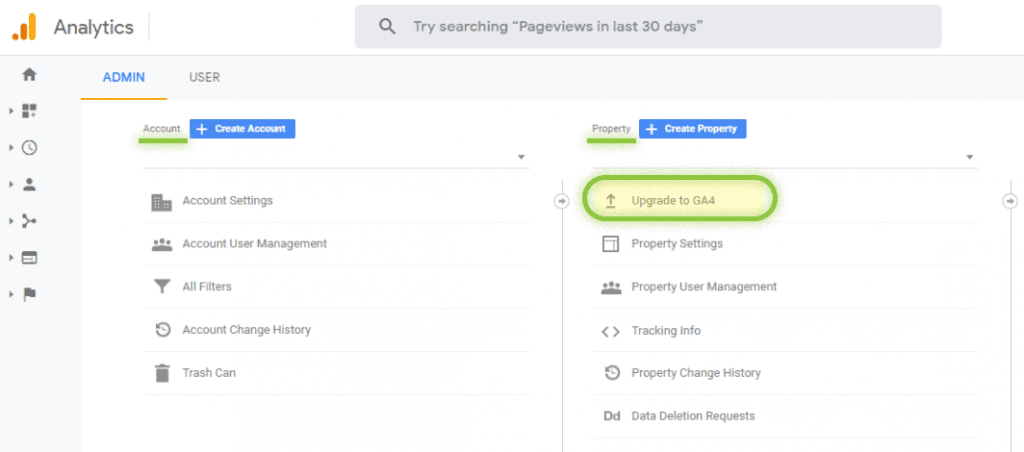
Start by accessing Google’s setup wizard. (This article assumes that you already have a Universal Analytics instance running.) You’ll find this in the admin section, under “Property.” The button is titled, “Upgrade to GA4.”
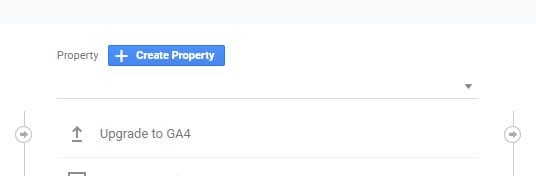
Click “Upgrade to GA4,” to launch the setup wizard.
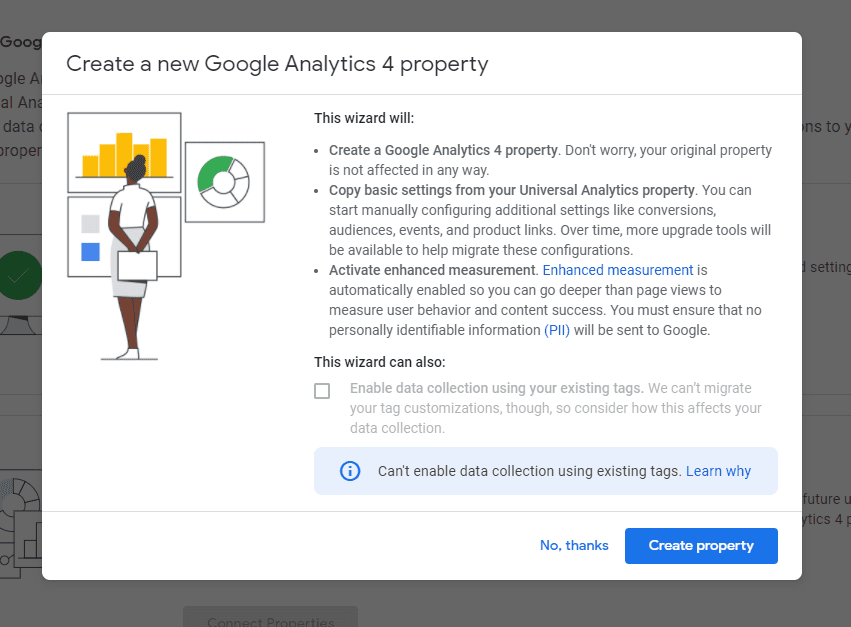
Next, enable data collection. You may have the option to enable that here, if you have your tags configured a certain way on your site.
If you’re using Google Tag Manager or another third-party tagging tool, you’ll need to enable the tag there for data to start appearing in the property. (We’ll cover the Google Tag Manager implementation in the next section.)

Either way, you should have the ability to create the property. Once you create it, you should be able to access the Setup Assistant. This module will contain your global tag to add to your site (if you need to), as well as settings for custom events measurement and some other new GA4 features. We’ll take a look at these one by one in an upcoming section.
Optional: Enable Tag in Google Tag Manager
Let’s take a look at one of the most common third-party implementations: Google Tag Manager. If you already have the Universal Analytics tag installed, this is a pretty easy upgrade.
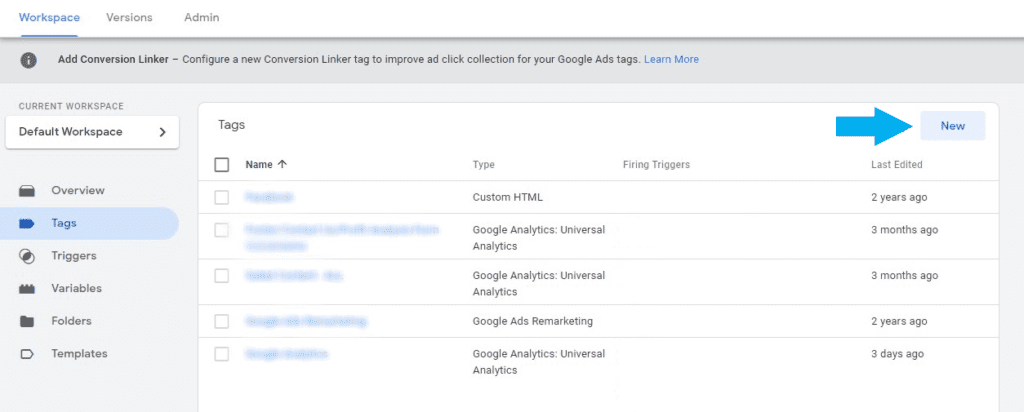
First, log into Google Tag Manager and click “New” to add a tag.
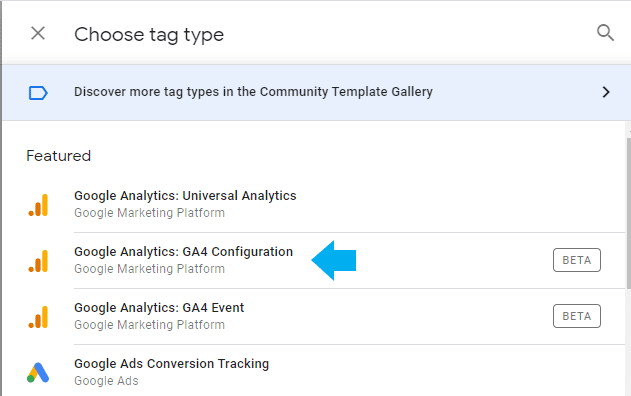
Then, select “Google Analytics: GA4 Configuration.”
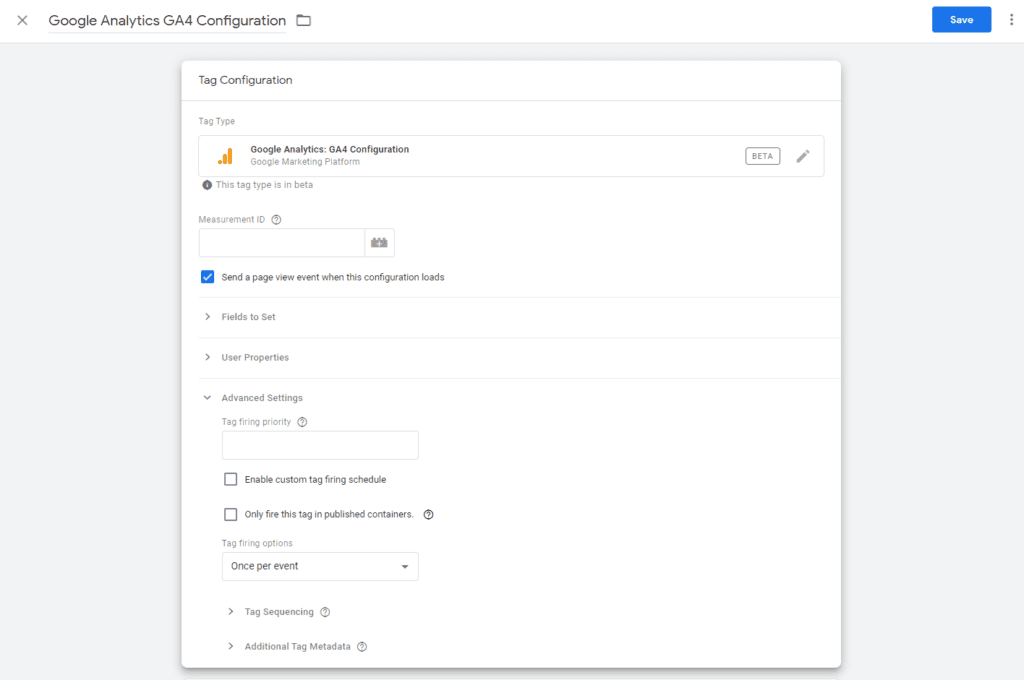
Once the tag configuration window opens, add your Measurement ID and make sure the tag is set to fire on all pages.

Then, add any fields or user properties you want to set (you may need these to instrument custom events or define audiences.)
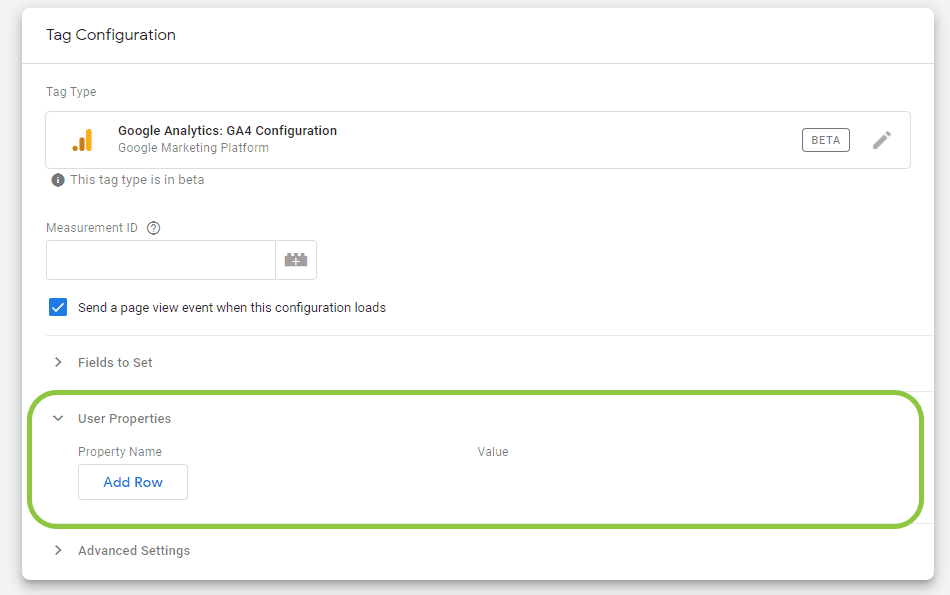
Publish the configuration, and you’re good to go!
Check Your Data
Once you’ve got the tag configured, check your property to ensure it’s collecting data correctly. You can do this by visiting your site, then opening your new GA4 property and navigating to “Realtime.” You should be able to see a visit from your geographic region.
Now that you’ve got the basics of your property set up, let’s look at a few ways to customize your GA4 property. (We went into more detail about these options in one of our how-to guides – check out 10 Options to Consider When Setting Up Google Analytics 4.)
Customize Your Property
Many of the options for customizing your property are in the Setup Assistant in the Admin tab. We’ll explain each customization option below:
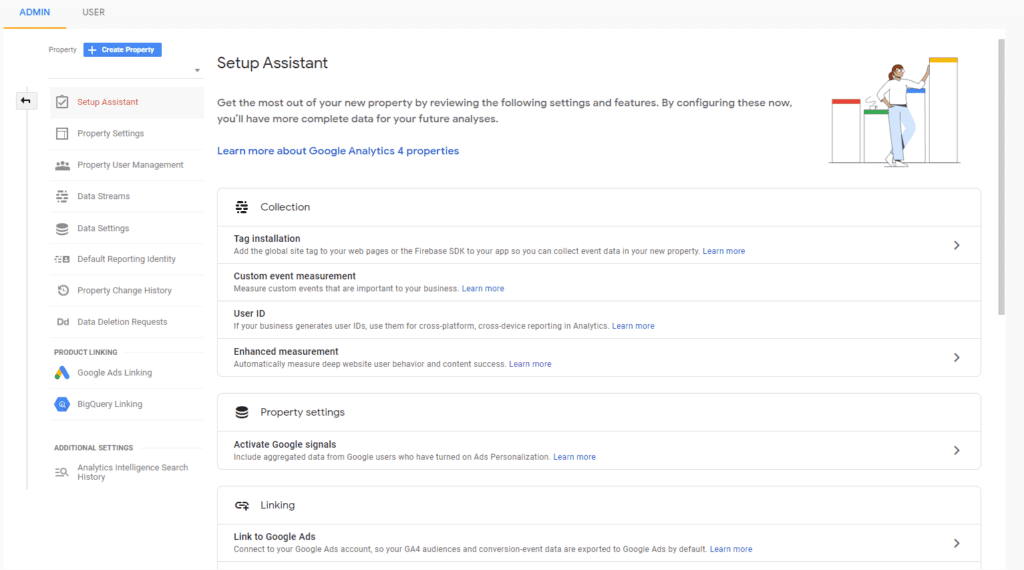
Custom Event Measurement: This option lets you add events to GA4 that aren’t found in the property out-of-the-box. Common examples include form submissions and clicks on specific links (if you want to track all “add to calendar” clicks for instance.)
User IDs: This feature gives you the option to assign a unique User ID to each site visitor. This ID will then let you tack users across platforms and devices, and opens up new data for audience creation. Note that this feature comes with a host of important considerations prior to launch!
Enhanced Measurement: This option enables a lot of Google’s machine learning capability. It will also enable you to measure interaction with your content via a number of default events, like page_view and scroll.
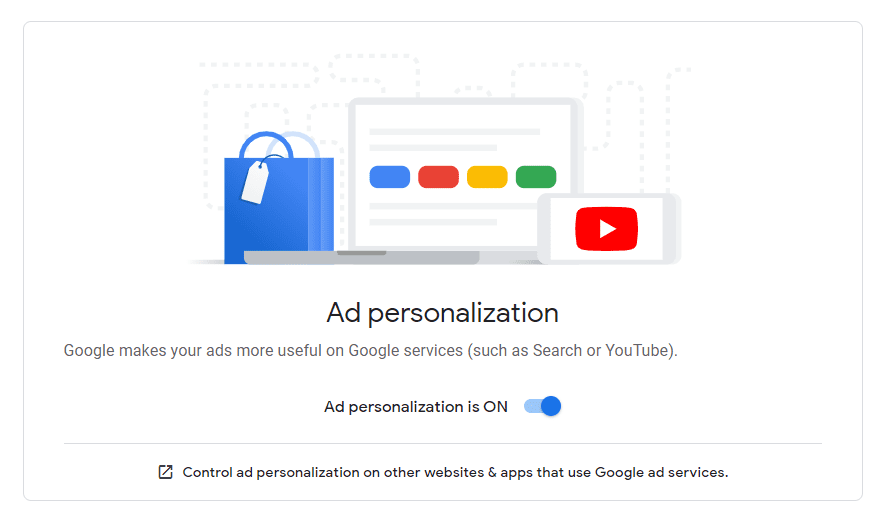
Activate Google Signals: This option, when enabled, includes data like cross-device reporting and demographic analysis from user who have Ads Personalization turned on.
Link to Google Ads: Somewhat self-explanatory; links your GA4 instance to your Google Ads account for analysis.
Link to Big Query: Links your Big Query database to GA4, so you can export Analytics data for querying.
Define Audiences: Allows you to segment your users into audiences for reporting and analysis purposes. (These audiences are also eligible for remarketing!) You can use the fields and user properties to help define these.

Set Up Conversions: Define custom conversions to assign value to your business’ most important interactions.
Implement E-Commerce Measurement: GA4 has some fairly robust e-commerce tools, which can be enabled here.
Manage Users: Finally, something that resembles Universal Analytics! As in UA, you can use this option to manage access to your GA4 property. Keep in mind that you may need to grant access to some users if they only have access on the property or view level to your UA instance.
We Set Up Google Analytics 4.
Here Are Our Thoughts.
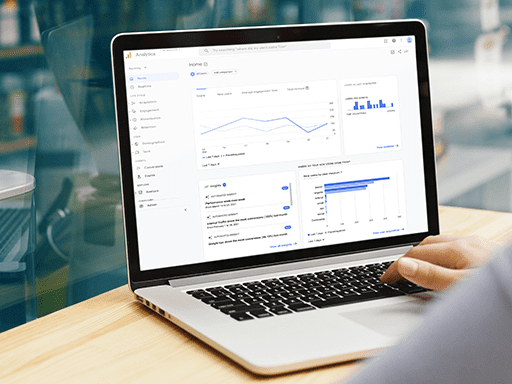
We’ve now had our instance running for a few weeks, and overall, reactions have been mixed! For power users, the new system might pose a bit of a hurdle, because many of the settings and reports you’re used to using have moved, been consolidated into the Analysis tab, or disappeared altogether. Simple tasks like filtering out certain forms of traffic (like internal traffic) require workarounds because the robust filtering tools seen in UA no longer exist, for instance.
New users, though, might find the streamlined GA4 much easier to understand than UA. The consolidated reporting makes it easier to locate simple data, and the Insights feature is a huge help in learning how to use GA4 to answer important business questions.
You Set Up Google Analytics 4 — How’s It Going?
In this blog, we jumped feet-first into GA4! Hopefully, you’ve gained some insight on the considerations that come along with upgrading to GA4 (and what you need to know before proceeding!) You should also now be familiar with the step-by-step setup process, and have some idea of what to expect in the first few weeks after launch!
Have you set up GA4 for your e-commerce business? We’d love to hear how it went and how you feel about the new Google Analytics! Reach out to us on LinkedIn or Facebook to share your thoughts!